Introduction to Advanced Fading Techniques
Advanced Fades in Barbering: From Basic to Pro appears here with practical context, and clear steps you can use in the chair today. This opening explains why a high-quality fade matters, and it includes how to do a skin fade haircut step by step so the reader knows what to expect. The paragraph uses plain language and strong focus on results.
A good fade changes how a client’s whole haircut reads, it frames the face, and it hides problem areas. You will read clear method, tool notes, and problem fixes. Expect useful tactics, a clipper over comb fade tutorial, and tips for fade maintenance that keep work looking sharp.
Why Mastering Fades Separates Amateurs from Pros
Here’s the thing, a solid fade shows control, taste, and technical skill. Mastering blending and gradient work sets a pro apart, because clients notice subtle transitions more than dramatic length changes. The right fade keeps clients coming back, and word of mouth spreads faster than ads.
What this really means is, practice deliberate motion, watch angles, and log errors. A few repeated mistakes ruin a reputation, while a repeatable method builds a portfolio and reliable bookings. Think about your process as a fade map you follow deliberately.
The Foundation: Understanding Basic Fade Techniques
Start with the basics first, low fade to high fade differences matter more than you think. A low fade sits near the ear, a mid fade crosses the temple, a high fade begins above the temple, and each one changes perceived proportions. Know the look before you cut.
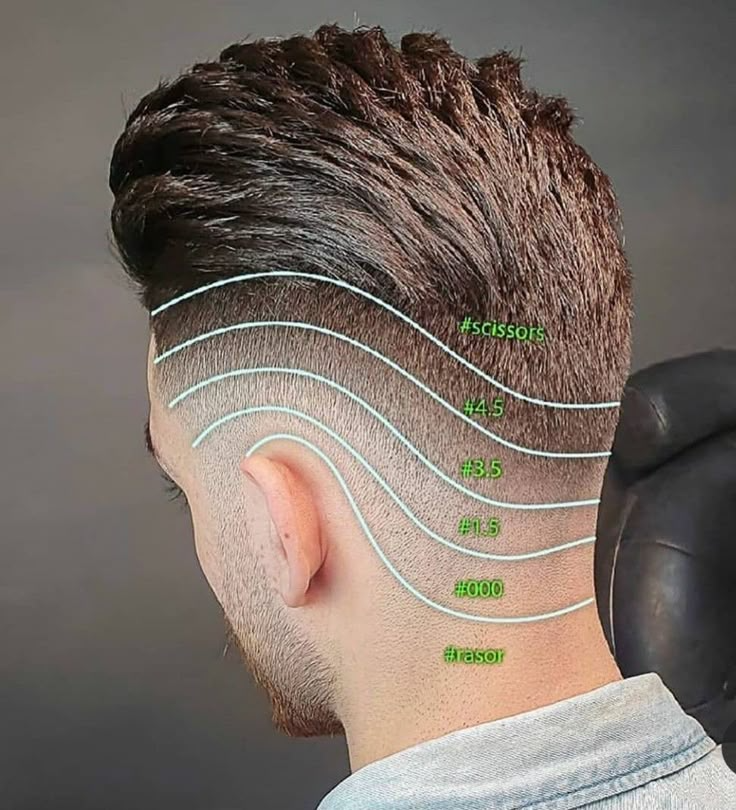
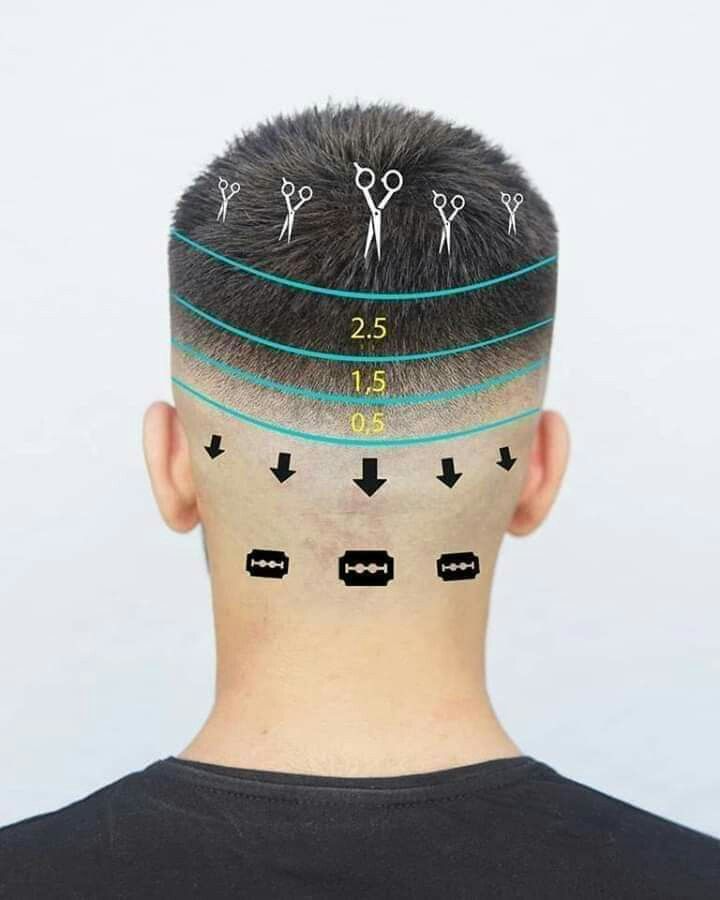
What to practice first is guard transitions and wrist rhythm. Use consistent guard steps, assess from multiple angles, and record your work. The fade chart concept helps you plan progression for guard sizes and gaps.
Tools That Make or Break a Fade
Tool choice is not vanity, it is control. A high torque clipper with crisp blades, accurate guard sizes, a reliable trimmer for line-up work, and sharp shears are essential. Keep clipper oil on hand and follow barber hygiene and sanitization routines.
The right gear makes blending faster and safer. Test a zero gap setup on practice heads before using on clients. A solid trimmer for lineup and detail produces clean edges, which clients equate to skill.
Step-by-Step Breakdown of a Clean Fade
Begin with a full consult and hair history, note cowlicks, parting, and growth pattern. Start with a baseline, set a guide at the lowest fade point, then progress in measured guard steps. Check symmetry often, and look from different heights.
Next, blend with clipper over comb or scissor over comb, refine with thinning shear work, and finish the perimeter with a clean edge-up and neck clean-up. The final review includes product choice and client instructions for fade maintenance.
Establishing Guide Lines and Angles
Set a consistent guide line using the same guard across both sides, then step guards up in small increments. Keep the head stable, and use visual checks every few seconds. Guard changes must be small, rhythm matters, and mistakes hide less in gradual transitions.
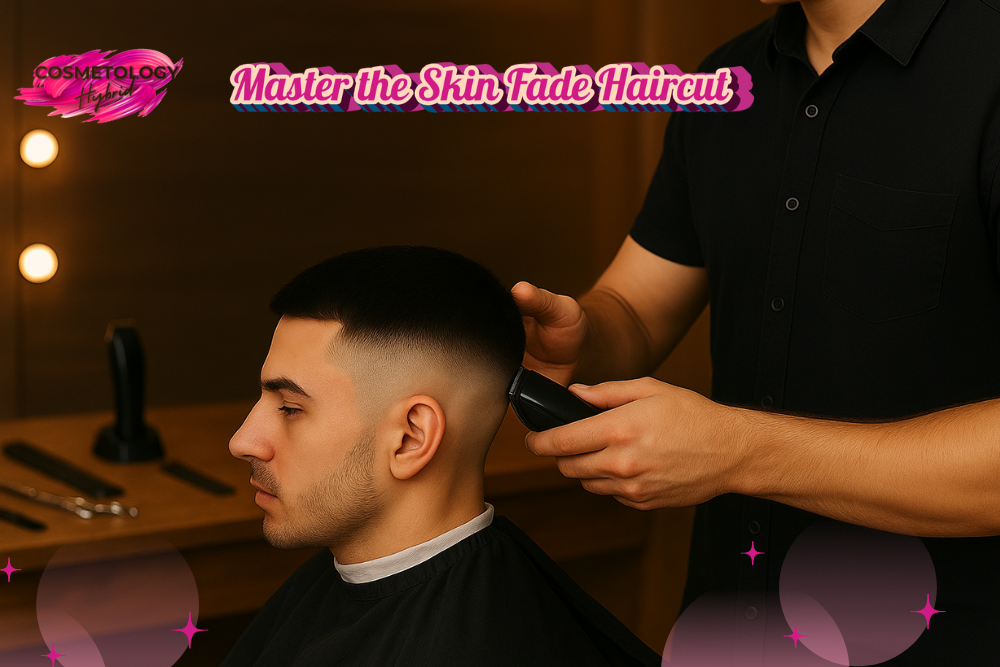
Skin Fades: How to Go from Shadow to Bare Skin
A skin fade haircut requires confidence with open blades and short, controlled strokes. Use short passes, keep the clipper flat to the scalp, and maintain skin tension. Avoid heavy pressure, and always check the blade temperature to prevent burns.
The zero gap fade technique guide helps with crisp contrast, but you should build the gradient first, then remove down to skin. If a client wants extreme contrast, set expectations for upkeep and touch-up frequency.
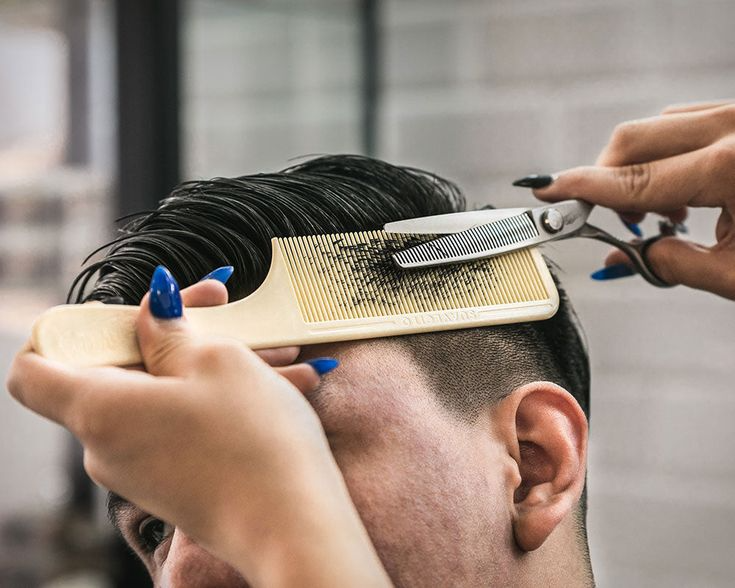
Scissor Fades and Clipper-Over-Comb Techniques
Scissor work adds softness and control, and a scissor over comb approach gives you nuanced top-to-side transitions. Use a firm comb angle and clear head positioning. Scissor fades suit longer top textures and clients who want blended volume.
The clipper over comb fade tutorial path is faster for dense hair, and it requires steady wrist movement and comb pressure. Alternate between both methods to handle different hair types without over-thinning.
Blending Secrets and Texturizing Tricks
Blending is the art of gradual change, and texturizing tools like thinning shears and point cutting are how you control weight. Remove bulk deliberately, in layers, and avoid random slicing that creates visible gaps. Use a razor for feathered edges if you know what you are doing.
A smooth seamless transition comes from slow guard steps, comb tension, and light finishing passes. Think of the fade as a photograph, it must look balanced from every angle under different light.
Adapting Fades to Hair Type and Head Shape
Curly hair compresses, so raise your guides and blend more gradually. Fine hair shows scalp fast, so adapt your tapering approach to retain density. For uneven skull shapes, alter your fade line to create optical balance, and review from the back frequently.
Consider client lifestyle and styling habits, because daily grooming affects how a fade behaves between visits. A thorough client consultation and hair history reveal maintenance tolerance and realistic expectations.
Mistakes Every Barber Makes, and How to Fix Them
Harsh lines are the most common error, and you fix them by softening with an intermediate guard or clipper over comb passes. Uneven crown blending is normal, correct with careful point cutting and cross-checking in natural light.
Over-thinning reduces shape, so restore weight by trimming the perimeter last and using texturizing sparingly. If a client leaves unhappy, offer a precise touch-up, explain the fix, and document what you did for next time.
Aftercare and Client Education
Explain fade maintenance, recommend styling finishing products like pomade or matte paste, and set a touch-up schedule. Tell clients when to return depending on the fade type, two to three weeks for a skin fade haircut, longer for softer tapers.
Give simple home tips, such as gentle neck cleans at home, and how to smooth cowlicks with product. Keep instructions short and practical, because clients follow what is easy.
Building Your Reputation with Fades
Use consistent before and after photo shots, same lighting and angles, to show progress. Post short process clips as Instagram reels that show method, not just results. A disciplined portfolio grows trust, and clients book skills they can see.
Case study, a small shop documented ten fades weekly for two months, and improved booking clarity by showing process in short clips. The exact numbers vary by market, but consistent content converts faster than occasional posts.
Marketing Your Fade Skills to Attract Clients
Local search matters, optimize your profile with keywords like barber near me skin fades expert and post client reviews. Show your technical terms in service descriptions, use clear pricing, and make booking easy with links for booking fade haircut appointment.
Run simple promos for new clients, and offer a discount for referral clients who post a photo. Trust forms where skill and communication meet, not through vague language.
FAQs on Advanced Fading, AEO Friendly Voice Answers
Q1. How often should I get a skin fade haircut?
Answer: You should get a skin fade haircut after two to three weeks.
Q2. How to fix a harsh fade line?
Answer: use a longer guard and blend upward with clipper over comb.
Q3. Is a scissor fade method for medium hair better than clippers?
Answer: it gives softer transitions for textured tops.
Q4. Which are the best clippers for fades 2025?
Answer: pick reliable high torque models with strong blades and service availability.
Q5. Can I learn basic to advanced fade techniques for barbers online?
Answer: yes, combine paid mentored courses with deliberate hands-on practice.
Conclusion: Leveling Up from Basic to Pro
If you follow the process above, log your sessions, and film playback, you will refine your eye and hands. Make small, repeatable improvements, and deliberately target one error each week. The payoff is steady, measurable skill growth.
Advanced Fades in Barbering: From Basic to Pro is a roadmap you can follow. Practice the clipper over comb fade tutorial, refine tapering, and keep a clean hygiene routine. You will build trust, bookings, and a portfolio that matters.
Table: Guard Sizes and Common Fade Levels
| Fade Level | Typical Guard Range | Notes |
|---|---|---|
| Low fade | 1 to 3 | Blend near ear, preserve side length |
| Mid fade | 0.5 to 2 | Crosses temple, balanced look |
| High fade / Skin fade | 0 to 1 | Strong contrast, high upkeep |